
AOL mails could be easily customized according to your needs. It allows you to personalize your email’s writing style, organize your incoming messages, customize the general look of the inbox, and much more.
- Firstly, sign in to your AOL Mail account using the link https://login.aol.com/.
- Then, open the extended menu by clicking on the Options button from your tab. And then click on the Mail Settings button.

- Then click on the tab for which you want to change the settings.
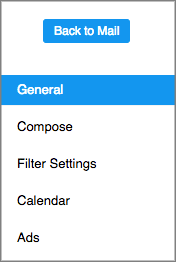
Tabs for respective settings.
In the following table, you will see the respective tab for each setting.
| SETTING | TAB |
| Calendar default view | Calendar |
| Calendar display | Calendar |
| Cc/Bcc | Compose |
| Contacts | General |
| Create new filter | Filters |
| Default compose mode | Compose |
| Delete filters (X button) | Filters |
| Display name | Compose |
| Edit filters | Filters |
| Font | Compose |
| Mail away message | General |
| New mail | General |
| Reading mail | General |
| Sending mail | Compose |
| Sender name display | General |
| Sender filter | Block Sender |
| Signature | Compose |
| Time zone | Calendar |
| Today on AOL | General |
Update the general settings
Once you have changed the settings according to your needs, click on the Save button to save it:
- Today on AOL- it shows you the latest news, your unread messages, and the mail tips.
- Sender Name Display- This shows you the Sender’s name or email address.
- Reading- Using this, you could choose how you want your emails to be displayed in your inbox.
- New Mail- Here, you could select the type of sound you want your device to play whenever you receive a new mail.
- Inbox Style- Here, you could customize your inbox.
- Mail Away Message- Here, you could enable as well as create away messages.
- Contacts- Using this, you could choose the style and sort your contacts the way you want.
Compose Settings
Change the following settings according to your requirements and then click the Save button to save it.
- Cc/Bcc- using this, you could show or hide the Cc/Bcc.
- Default Compose Mode- Here, you could customize the compose screen according to your need. The following are some options for customization.
- Write mail in a pop-up screen.
- Write mail in full plane compose.
- Write mail in a separate window.
- Rich text/HTML- Here, you create your signature and then enable Rich Text/HTML editing to use your desired font and color.
- Display Name- Here, you could enter the name you want to be displayed when you send any mail.
- Sending- Here, you could select how you want your sent messages to be checked.
- You could select the option of your messages to be checked for spellings before being sent.
- You could select the option for the email addresses to be automatically added to your contacts.
- And you could select the option that if you want a sent confirmation message to appear on a separate page.
Steps to Update your Block senders list
By following these steps, you could update your Block senders list:
- Firstly, open the Block Senders tab.
- Now type in the email addresses that want to be blocked; under the Block mail from addresses, I specify the option.
- To add email addresses to this list, tap on the + icon.
- And the same way, click on the x icon to remove email addresses from the blocked list.
Steps to update the Filter settings:
With the help of the filter, you could decide where you want your Incoming emails to go. After creating the filter, you will be able to delete or edit it from the same screen.
To delete a filter, select the X button adjacent to the Edit button.
To create a filter, do the following:
- Tap on the Create Filter option.
- Now type or select the parameters of the filter.
- And last, tap the Save button.
To Edit a Filter
- First, take the cursor over the filter name.
- Then tap on the Edit button.
- Now select or type the changes that you want to make.
- And at last, tap the Save button.
To update the calendar settings:
After changing the following settings, tap on the Save button to save the settings:
- Default View- Here, you could select the default view, such as Day, Week, or Month.
- Time Zone- Here you could select your preferred time zone.
- Display- Here, you could select the time around which your typical day goes.
Conclusion
We have given you the information about the sign-up and login of the AOL mail account in this article, as you have understood well. How to strong your password is also mentioned in this. If you have any questions about AOL mail, we will help you with that.